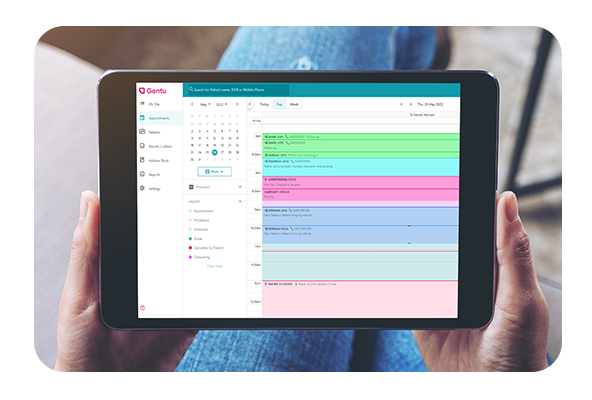
Our Training Team recently ran a Lunch and Learn webinar covering their quick tips for getting the most out of Gentu.
This webinar is perfect if you currently use Gentu in your medical practice, if you need a refresher on some of Gentu’s capabilities or if you’re new to Gentu and looking to scale up your knowledge quickly.
About Lunch and Learns
Genie Solutions runs regular free Lunch and Learns spanning topics requested by our customers. They are a great opportunity to connect with our Trainers, to pick up tips so you can get the most value out of our products and to make sure you’re up to date with the latest features.
The best way to see what our next Lunch and Learn topic will be is to follow us on Linked In or make sure your contact details are up to date with our team.
Gentu Tips and Tricks – Lunch and Learn
Part one of this Lunch and Learn video focuses on tips for general use and administration, while the second half hones in on tips for clinicians. You will also find a summary of the tips and tricks below with links to the relevant Knowledgebase articles if you need further instructions.
 Admin Tips
Bookmark Gentu in Chrome
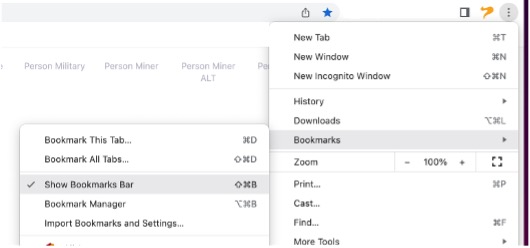
To enable the Bookmarks Bar in Chrome, go to the three dots in the top right-hand corner, click on Bookmarks and Show Bookmarks Bar.
Make sure Gentu is open to the Appointment Book and then click on the star icon to the right of the address. Rename the bookmark accordingly and click on done. That will now save Appointments in your Bookmarks.
Open multiple Gentu screens at the same time
Because we access Gentu via a browser, we can open as many tabs or windows as required. A good scenario of this would be to have your Appointment Book open along with your Patient Record or, from a clinical perspective, the doctor may want to open two Patient Records at the same time.
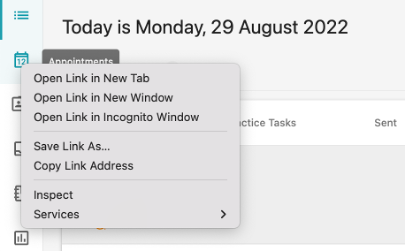
To do this, find the link you would like to open, right click on the link and choose Open Link a New Tab.
This will open another tab along the top. Alternatively, if you have a scroll button on your mouse, you can click on the scroll button and this will open the link automatically or press command + click the link you want to open on Mac.
Reorder provider’s appointment columns
If you have multiple providers practicing, you can rearrange the doctor columns by simply clicking on the six dots next to the doctor’s name in the bottom left and dragging and dropping them into position. This will instantly reorder the actual appointment columns in Gentu.
For instructions on reordering provider columns, click here.
Set up schedules in the Appointment Book
If your doctor works on a fortnightly or full weekly roster. It could be useful to have the week numbers appear at the top of the Appointment Book. When setting up the schedule, we generally recommend to view the appointment book in Week Mode. That way, you can easily apply this schedule across numerous days of the week without having to flick between dates.
For instructions on setting up schedules, click here.
Move patient appointments
You will come across many patients who change their minds and want to move their appointments. Or you may have selected the wrong date and time when booking a new patient appointment. There are two ways in which you can move appointments.
Add a patient to the waitlist and populate appointments from the waitlist
It is not uncommon for doctors’ appointment books to be booked out weeks or months in advance. Therefore, a waitlist may be required to help manage your patient appointments.
For instructions on adding people to the waitlist, click here.
Leading on from this tip, you may also have someone who has cancelled their appointment so now you want to fill that gap with a patient from our waitlist.
For instructions on filling an appointment from the waitlist, click here.
Using admin notes
The Admin Notes section in Gentu is where we can store non-clinical notes and messages such as ‘left voicemail’ or ‘tried to contact the patient’. You can also choose to ‘flag’ these notes so the doctor will see them at the top of the screen during the consult.
For instructions on creating admin notes, click here.
Generating a quote using billing sets
For procedures that require a decision process, you may need to create a quote to send to a patient.
For instructions on creating a quote, click here.
Practices who are signed up with Patient Payments will also have the capability to request patients pay their quote online so patients can pay their accounts in their own time without having to contact the practice.
 Clinical Tips
 Clinical Tips
Notifications
Notifications help to bring your attention to new information in tasks in your general system. If you’ve turned on notifications in Gentu, you’ll notice a bell icon in the top right-hand corner of your screen next to your name – a pink badge will be displayed alongside the bell icon when you have new notifications.
For instructions on notifications, click here.
Adverse reactions
In the same way you can flag an admin note, you can also flag an adverse reaction for a patient if a patient has any known allergies or reactions. You can include these in the adverse reactions module in the clinical tab to add a reaction for a patient.
For instructions on setting adverse reactions, click here.
Clinical annotations (Notes)
A feature that some users may not know about in Gentu is the ability to annotate clinical contacts for a patient. The notes feature allows you to write a summary or a short comment for quick reference, so no limits on the text you can enter the for a note. A note can be added against a consultation, a letter, a result, a procedure, an attachment, and even a pregnancy record.
For instructions on adding clinical annotations, click here.
Reasons for Encounter
If you create your consultation notes in Gentu, the first field to complete is the reasons for encounter. This can be a free text field, or you can add to a list of commonly used reasons to select from the dropdown menu. Adding to the list of reasons for encounter to streamline the process, for creating consultations and improve the consistency and accuracy of the data entry.
For instructions on editing the reasons for encounter, click here.
Custom Consultation Fields
Another great feature of the consultation records is being able to customise your consult templates because not every doctor or clinical team member works in the same way. Gentu allows each provider to select the fields they wish to show in their consult notes.
For instructions on customising consultation fields, click here.
Text Shortcuts
Text shortcuts allow users to create abbreviations for frequently typed information. You can add a text shortcut for words, sentences or even paragraphs of text, and the shortcuts created are specific to each user. At present, text shortcuts are only available for consultants to add to your list of text shortcuts when creating a consultation. Click into any of the fields and you’ll see the message that the text shortcuts are now active.
For instructions on using text shortcuts, click here.
Appointment Wrap-up
The Wrap-Up feature aids in the communication of billing instructions to the admin team, reduces double handling and can ensure billing accuracy. It can also be helpful if you’re consulting remotely to your admin team.
For instructions on the Appointment Wrap-up Feature, click here.
Need more Gentu help?
We offer group training courses you can attend or bespoke training for your practice which can be completed remotely or onsite. If you book in a training time with us, you can work with our trainers to create a tailored plan for the session based on your team’s specific needs.
You can also find more product help on our Knowledgebase.